This page explains how to set up to read/write emails of @u address (…@u.tsukuba.ac.jp) in Clients using SMTP, IMAP or POP (e.g., Thunderbird) .
Manuals for Microsoft 365 email and authentication settings (PDF).
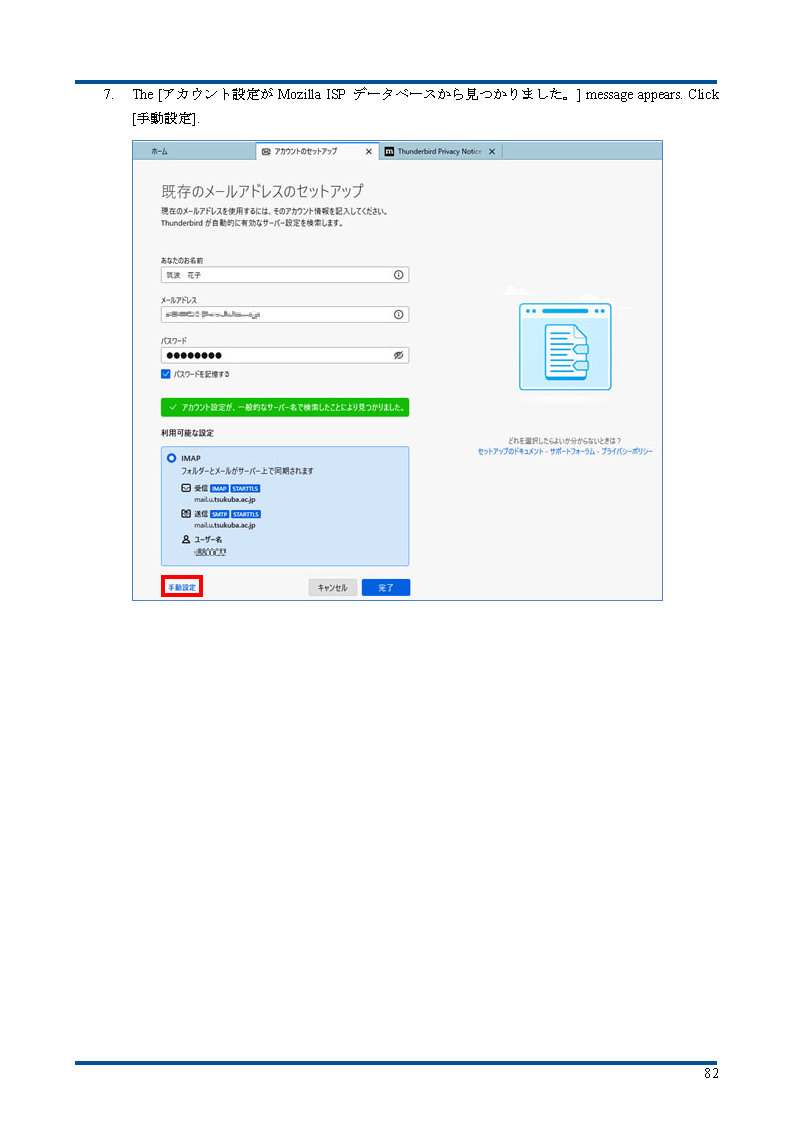
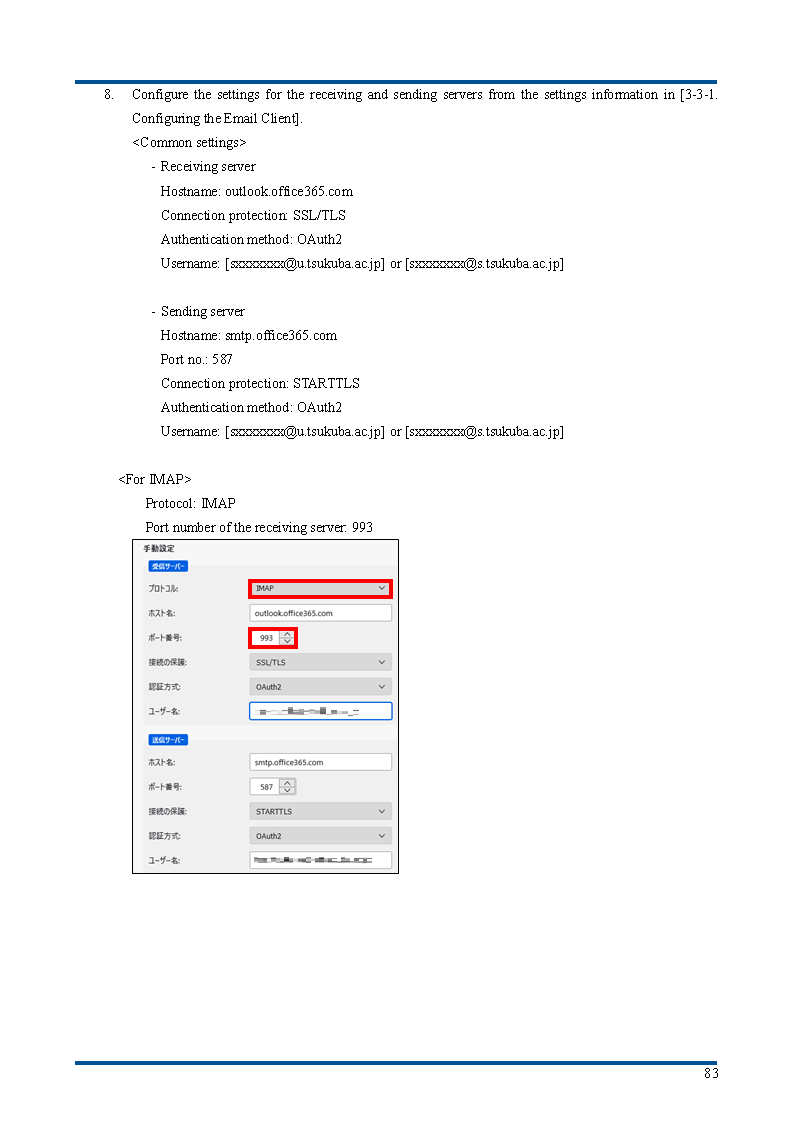
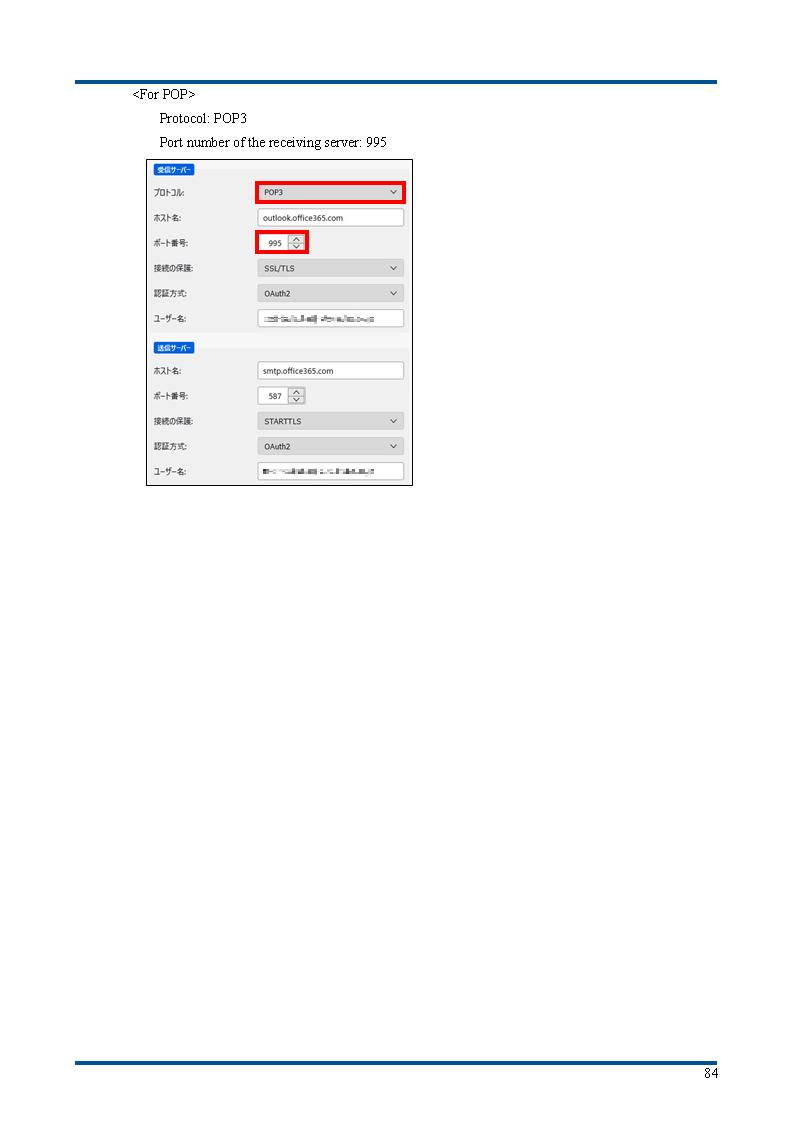
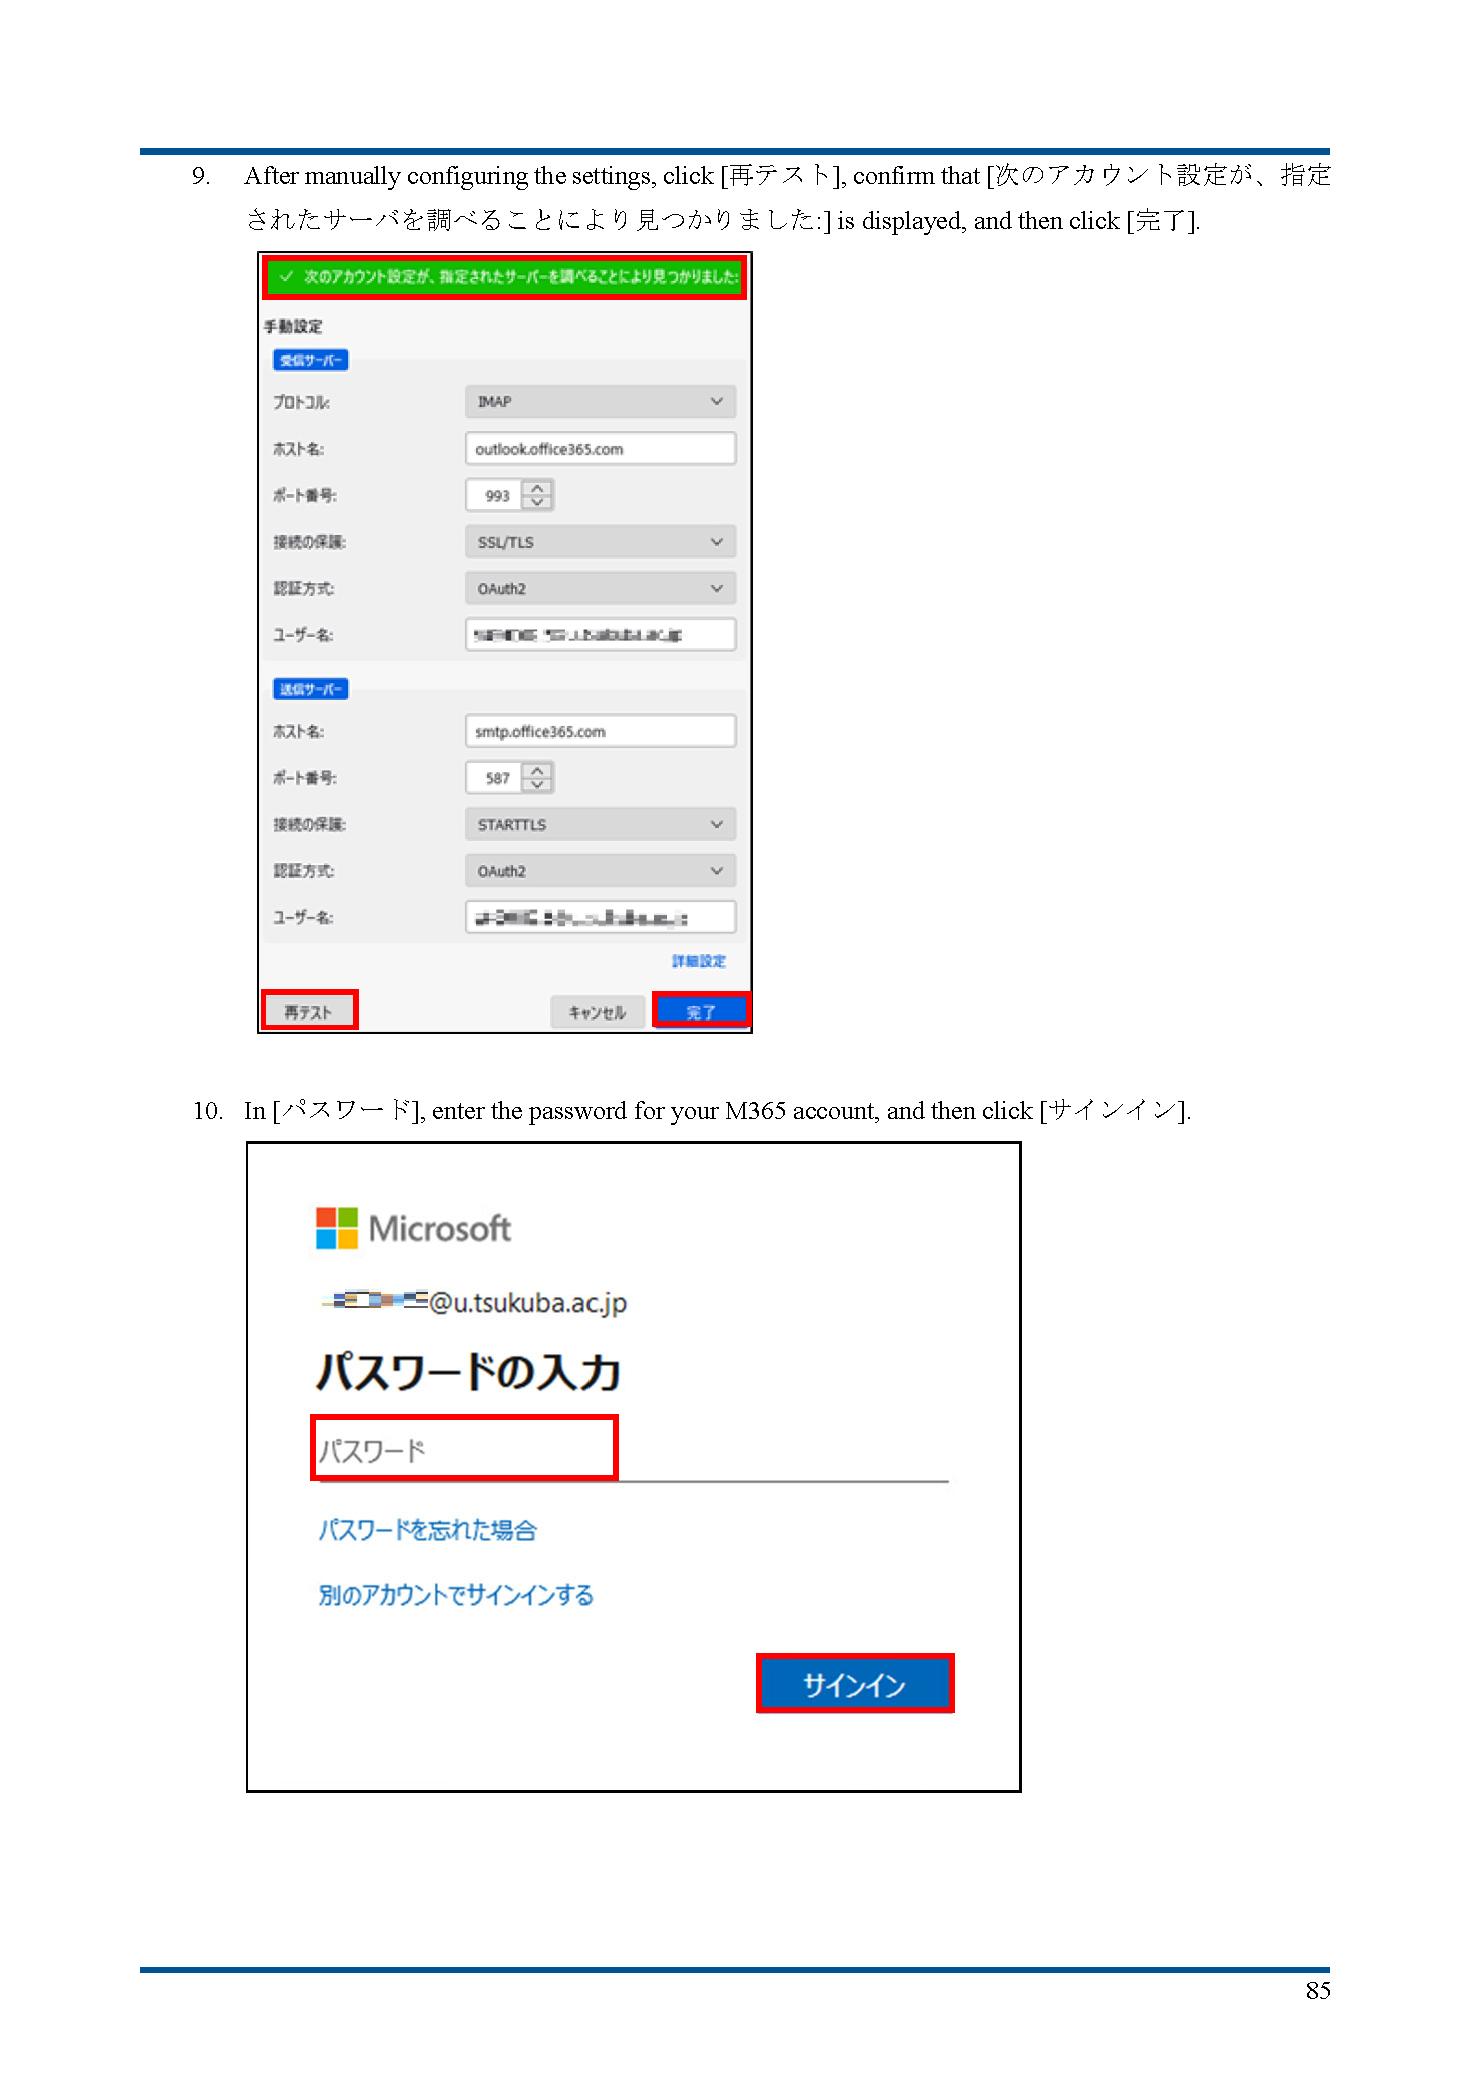
Add IMAP/POP e-mail account
| When using POP or IMAP | ||
|---|---|---|
| User name | Your @u e-mail address | |
| Password | Password for using Microsoft 365 | |
| Incoming | Incoming server name | outlook.office365.com |
| IMAP4 incoming port number (Encryption method) | 993 (TLS (SSL)) | |
| POP3 incoming port number (Encryption method) | 995 (TLS (SSL)) | |
| Outgoing | Outgoing server name | smtp.office365.com |
| SMTP outgoing port number (Encryption method) | 587 (STARTTLS) | |
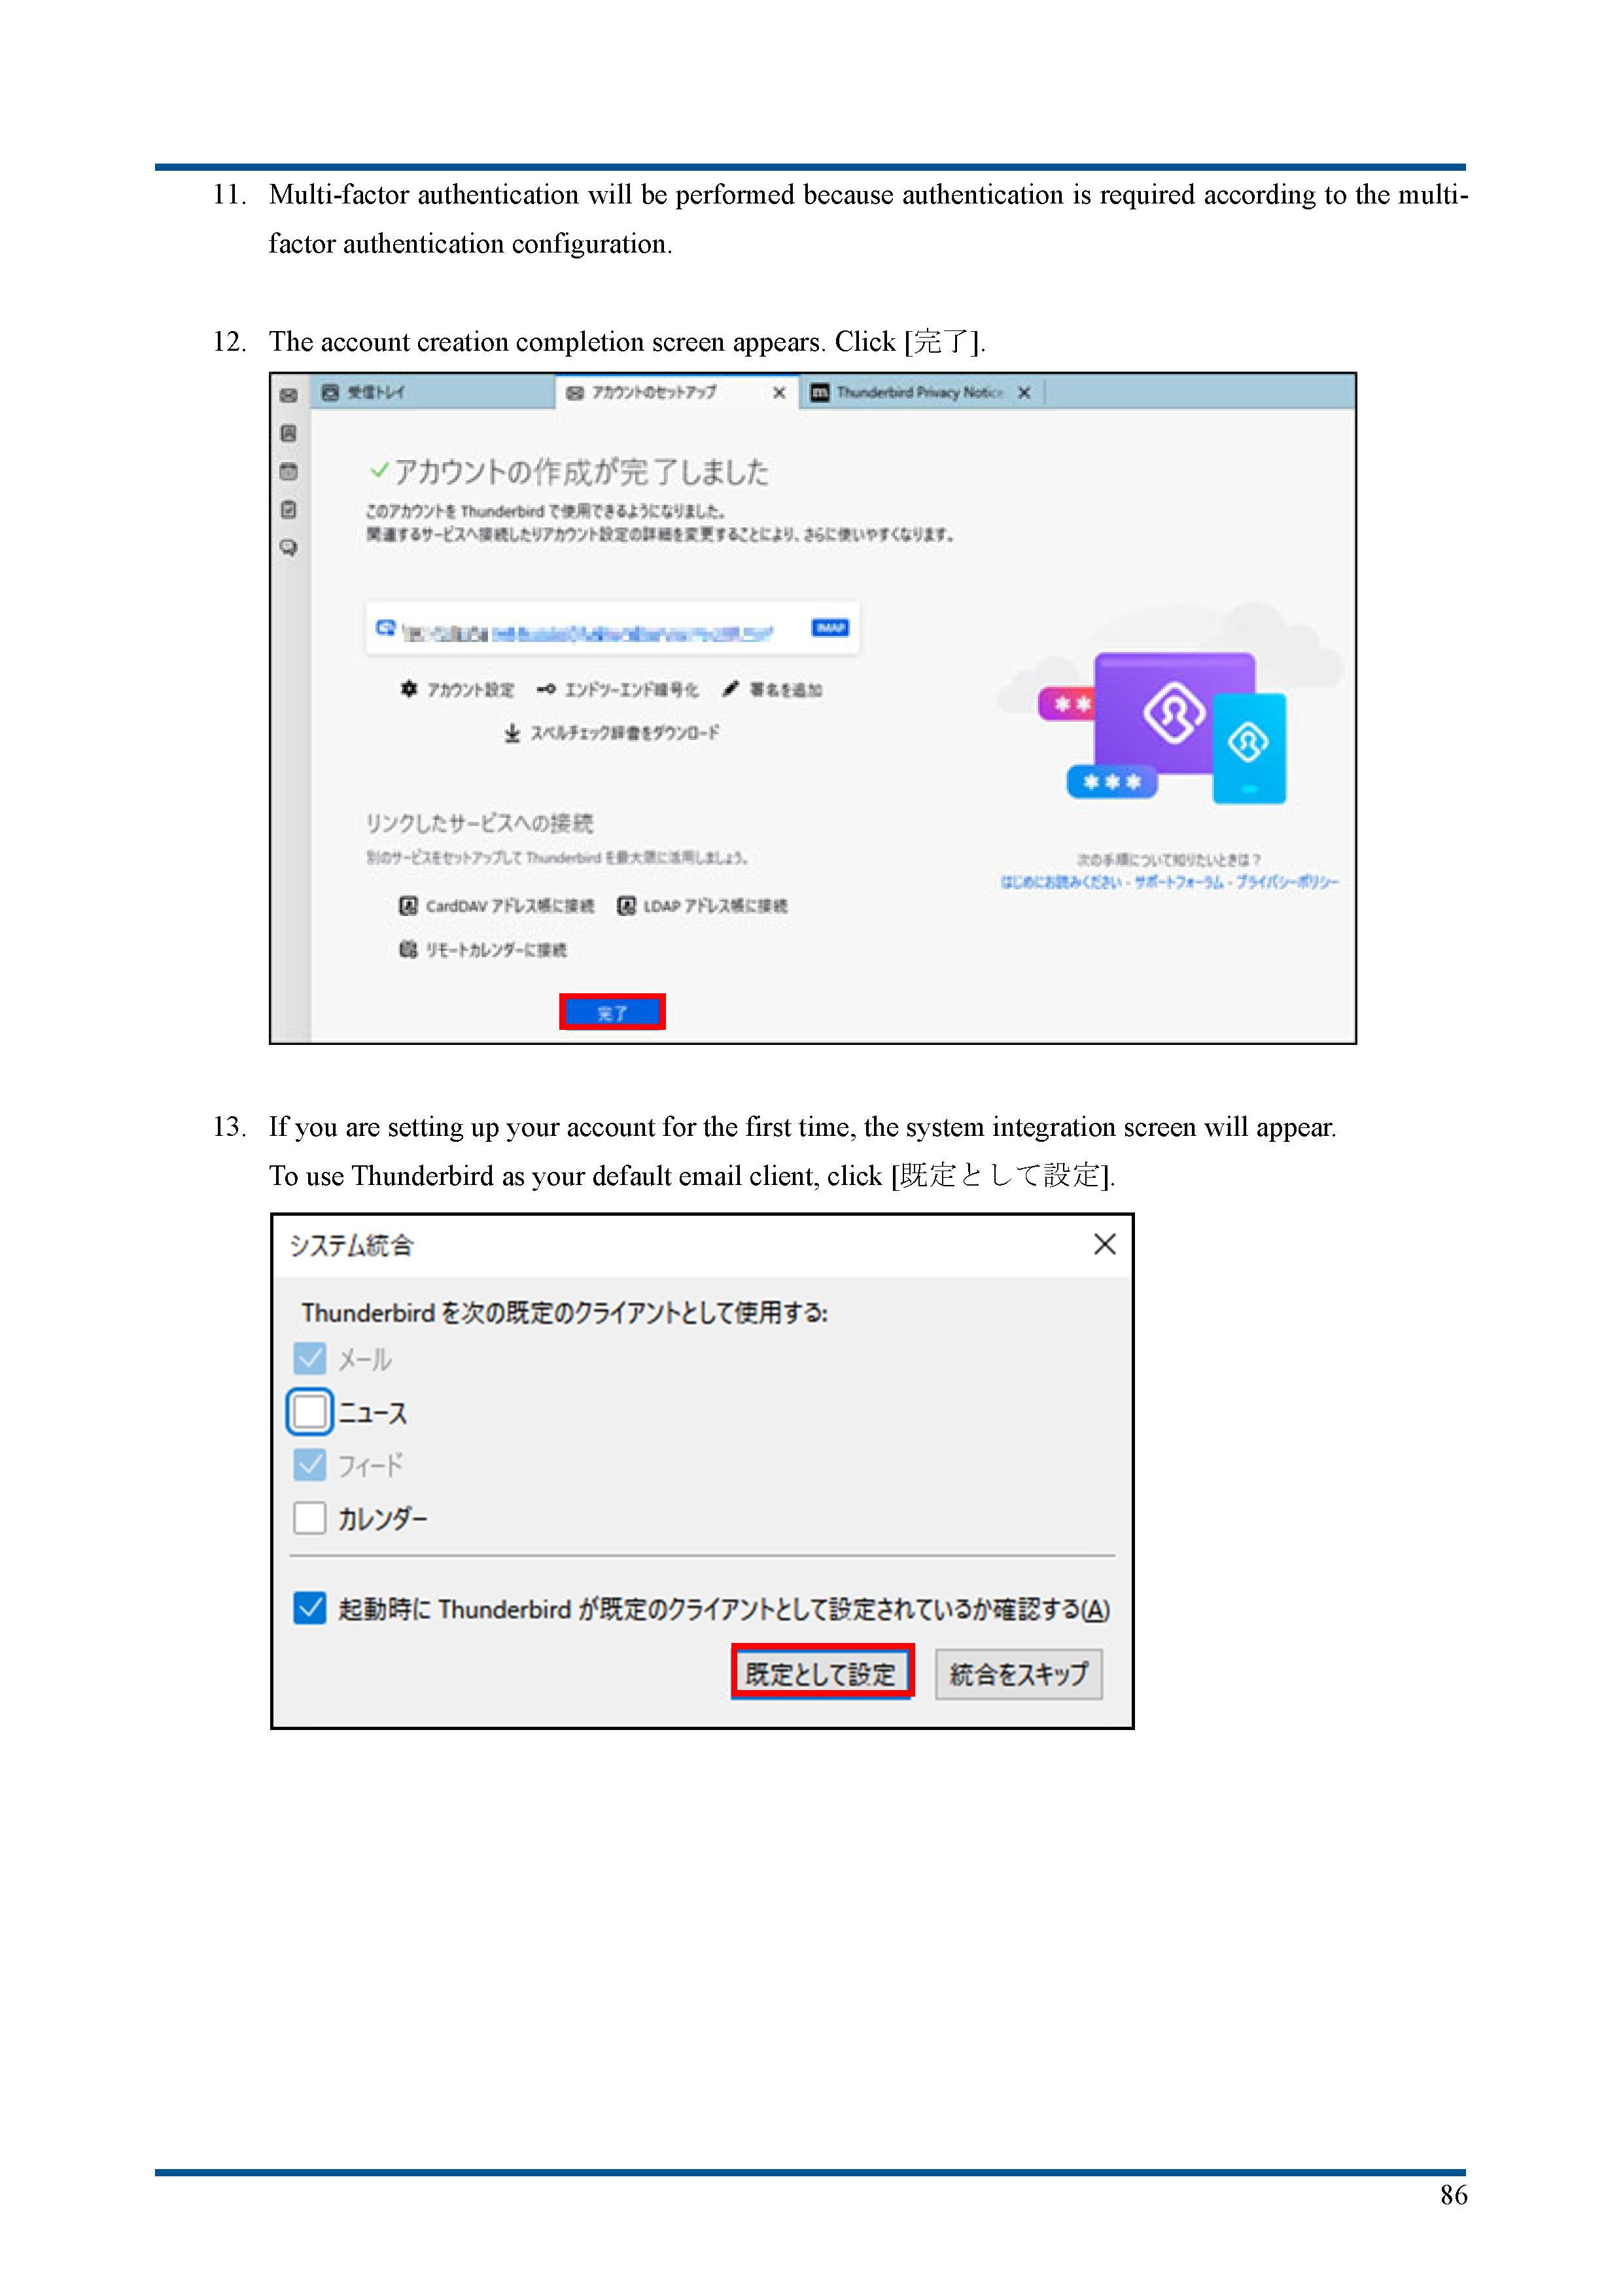
| Email sending requires authentication. The client software must support OAuth2 authentication. |
||
Differences between POP and IMAP
(* Basically we recommend using IMAP.)
If you are prompted for administrator authentication in your browser after entering your password, try updating to the latest version of Thunderbird.
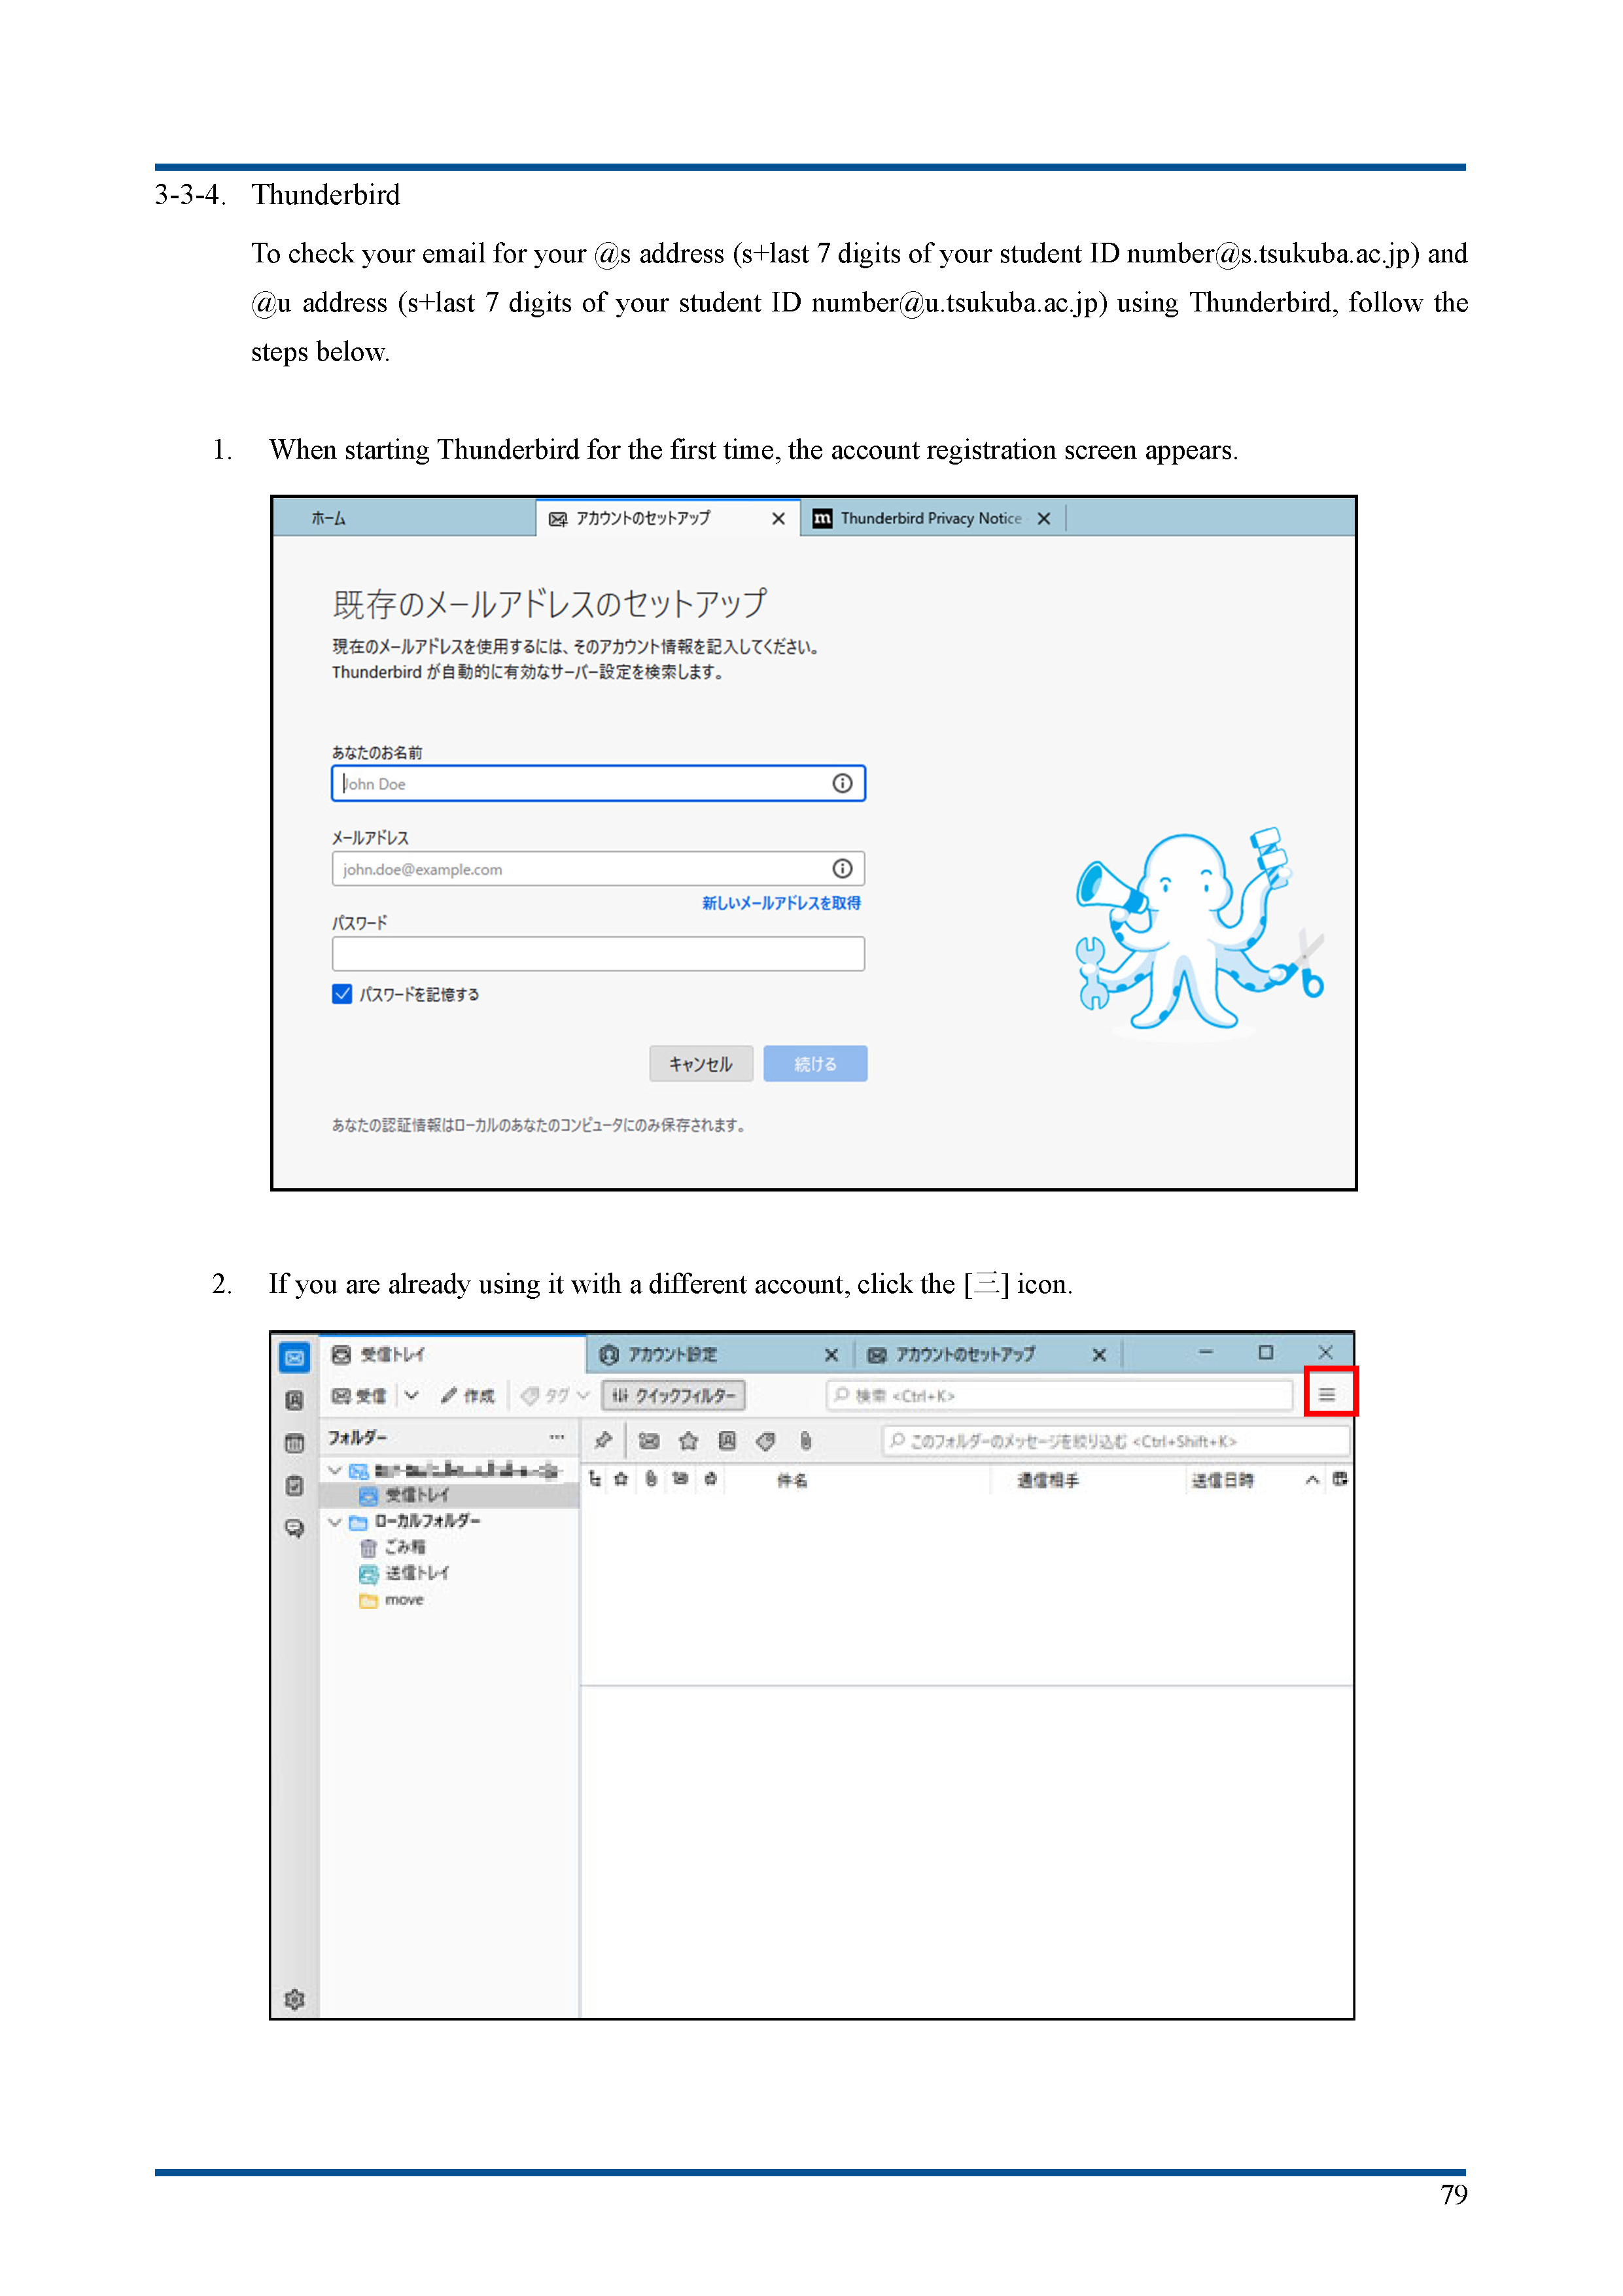
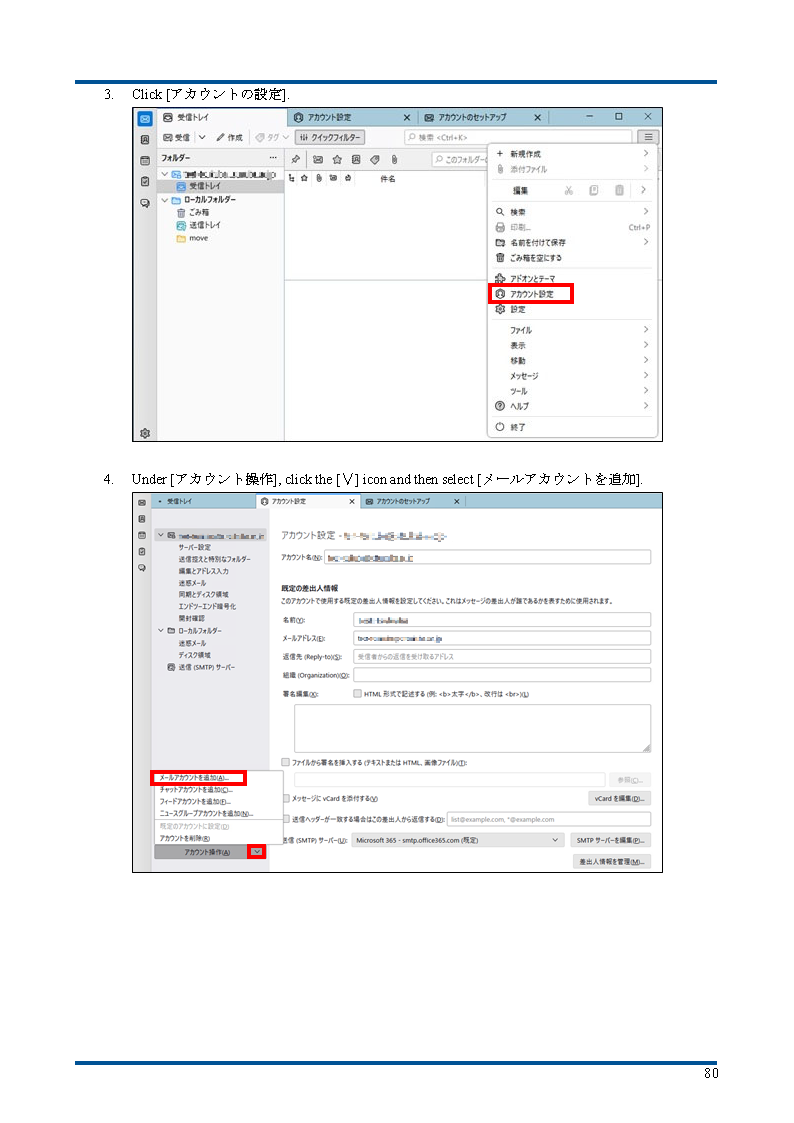
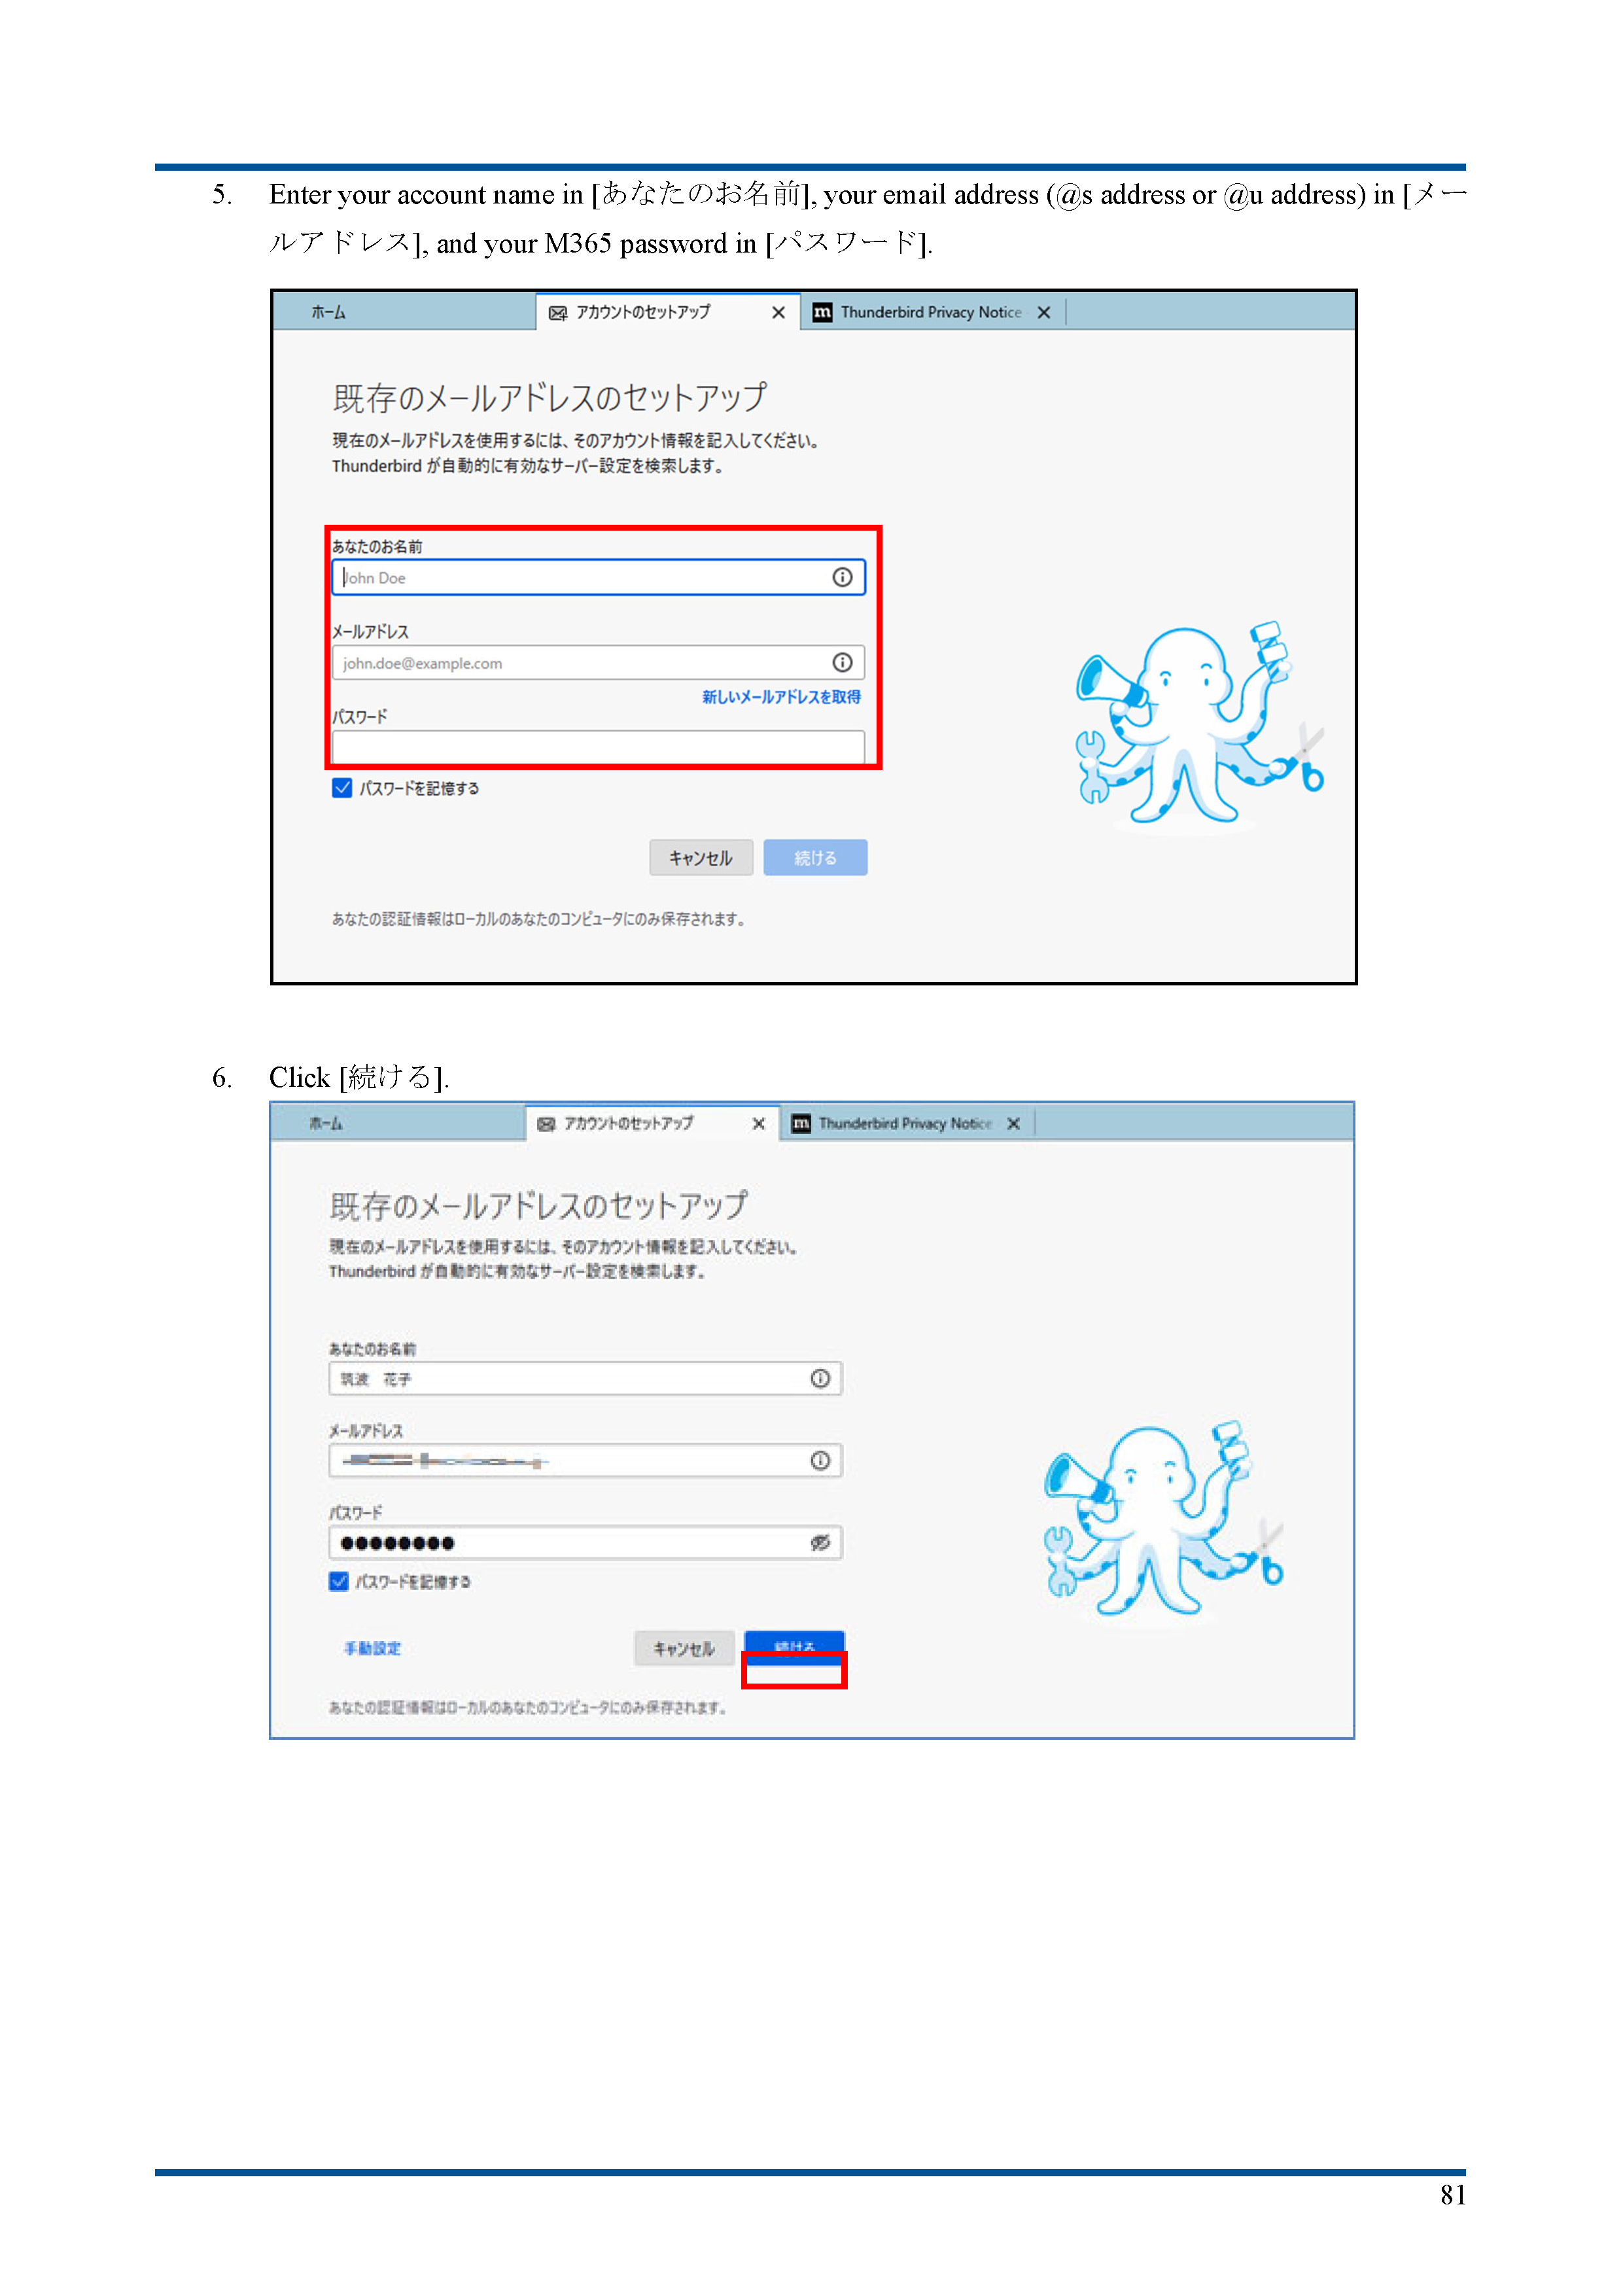
Below is an example configuration for Thunderbird
This section uses the latest version of Thunderbird (102.x) at the time of writing (February 2023) as an example.
The manual is also available as a PDF file.
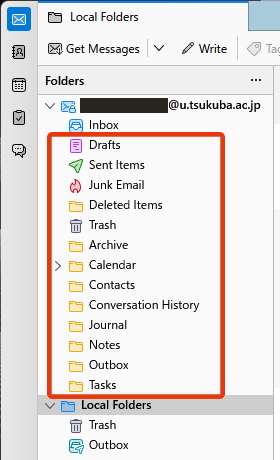
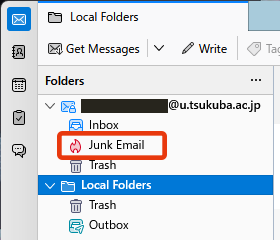
How to check the “Junk Email” folder
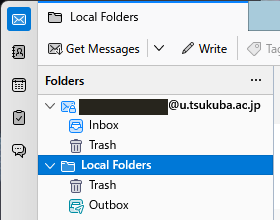
In Microsoft 365, filtered e-mails are moved to the “Junk Email” folder.
If you wish to use the “Junk Email” folder for misclassification checks, you will need to configure your e-mail client.
Below we describe two different ways to use the “Junk Email” folder in Thunderbird.
Subscribe to the “Junk Email” folder
This section uses the latest version of Thunderbird (102.13.0) at the time of writing as an example.
- If the “Junk Email” folder is unsubscribed, the “Junk Email” folder will not appear in your @u account.
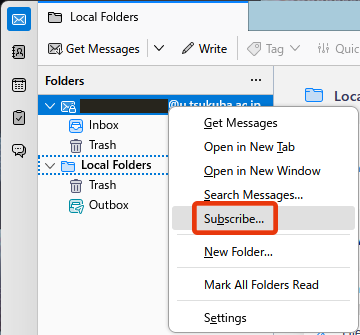
- Right-click on the @u account and click “Subscribe…” from the menu.
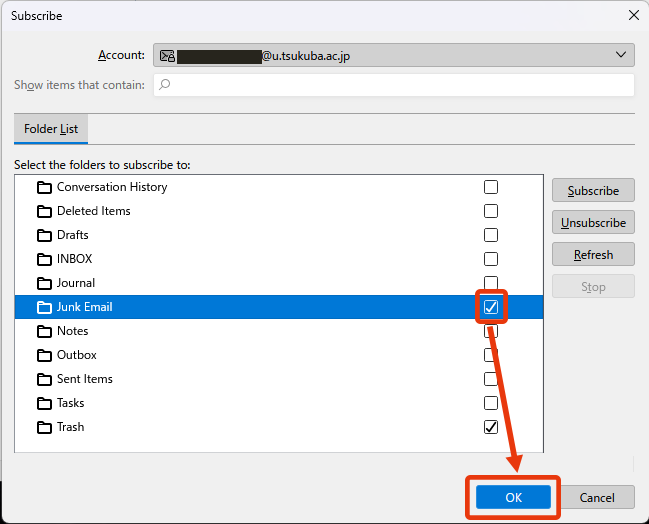
- The “Subscribe” dialog box will appear. Check the “Junk Email” checkbox and click the “OK” button.
- Thereafter, the “Junk Email” folder will appear in your @u account folder list.
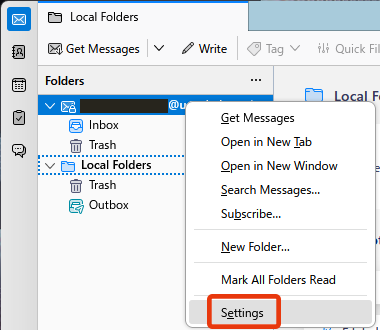
Show Unsubscribed Folders
This section uses the latest version of Thunderbird (102.13.0) at the time of writing as an example.
- Right-click on the @u account and click “Settings” from the menu.
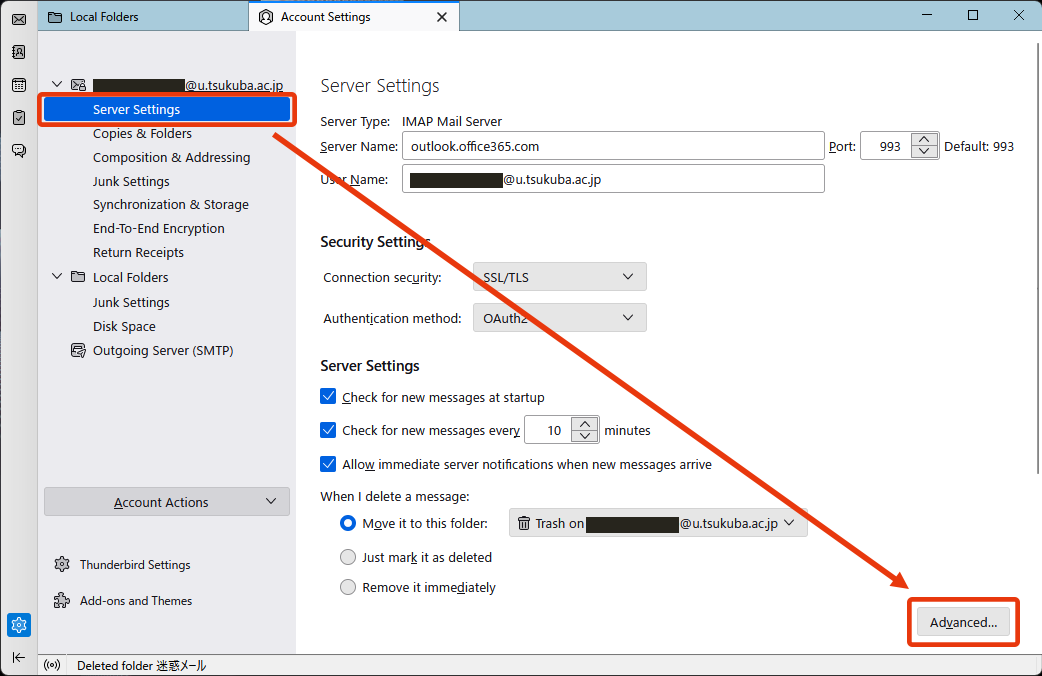
- The Account Settings dialog box will appear. Select “Server Settings” for the @u account on the left and click the “Advanced…” button on the right.
- The Advanced Settings dialog box will appear. Uncheck the “Show only subscribed folders” checkbox and click the “OK” button.
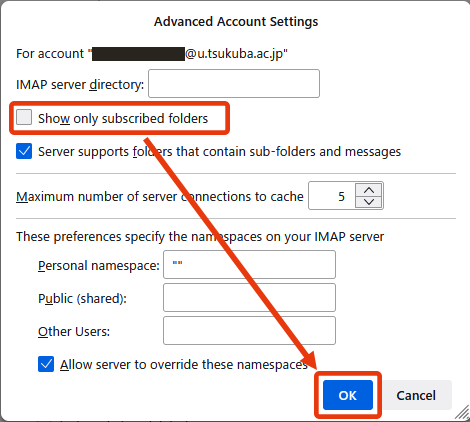
- Then restart Thunderbird. After the restart, the “Junk Email” folder and other unsubscribed folders will also be displayed.